
I’ve been seeking the Perfect Pad Thai for sometime now, and just haven’t liked any of the versions I’ve tried all that much.
However, after thoroughly reading She Simmers’ treatise on Pad Thai (there are FIVE PAGES devoted to how to make Pad Thai) I feel like I’m getting awfully close. Not there yet – but REALLY close.
Of particular help was her tutorial on how to handle the noodles. The package directions and most sources on the Internet often tell you to boil the noodles, but I quickly discovered this makes an icky glommy mess of rice noodles. That’s just wrong! I’M TALKING TO YOU, TRADER JOE’S!
So then I switched to just soaking them – but how to tell when they’re soaked ENOUGH? Well She Simmers cleared that up for me as well – now I know I can quit soaking them when they pass the twirl test – take a rice noodle and wrap it around your finger several times. If it wraps nicely and doesn’t keep trying to sproing back on you or break, it’s soaked. If not – soak it a little while longer. For the first time, I can reliably stir fry rice noodles now and have them come out right EVERY TIME, whereas before sometimes they would come out ok, but sometimes they would just be overcooked and falling apart.
Then there was the tamarind called for – I’ve cooked Indian style food for decades, but I’ve always shied away from block tamarind because I could never get clear instructions regarding how to handle it. “Oh, just soak with some water and then take out the seeds and fiber”.
Ummm, ok – how much water? “Oh, enough”. How to remove the seeds and fiber? “Oh just take it out with hand, squeeze out the water.”
I tried this a few times and it never worked out the way I thought it should so I finally gave up and relegated myself to using the Tamcon/Tamicon “concentrated” tamarind paste – which is NOT, I repeat NOT, appropriate for use in making Pad Thai. For making sambar or rasam – OK, but anything else, it’s just the wrong stuff.
Other times I was steered by the workers at Asian Markets to this thin watery stuff that was basically pretty similar to the Tamcon/Tamicon stuff, only with a lot more water in it. Usually it’s labeled “tamarind water” and that’s a pretty apt description.
Uh-uh. This is ALSO not appropriate for Pad Thai. There is NO pulp in the Tamcon/Tamicon concentrate, and not much in this other stuff. Trust me, no matter what somebody in an Asian market tells you, it’s the wrong stuff.
Rogue’s Gallery of the Wrong Stuff:


The basic “recipe” for extracting pulp from a block of tamarind is to use a volume of water (in ounces) equal to the weight (in ounces, but this is by weight) of the block tamarind.
Example: for each 8 oz by weight of tamarind, use 1 cup (8 fluid oz) of water.
The rest is all procedure.
You want the block tamarind that is already mostly pretty well cleaned up – if it looks like this:  it is NOT what you want – that stuff has a ton of hulls and seeds in it. You can clean it and use it but there’s a lot more waste and it’s a huge pain. Also, I wouldn’t use a good strainer – those seeds and hull pieces can be tough.
The stuff you want will look sort of like a black square or rectangle of tar:


It may say “Seedless” and should be fairly seedless (though I usually find a very few seeds anyway). It may say “wet tamarind”. It may only be labeled in the script of the country of origin. But it will look something like one of these, and not like the other picture above.

You will be using about 1 ⅝ cups (1.5c plus 2 T) of water with one full 14 oz block of tamarind. This will make enough tamarind for about 2 ¾ recipes of Pad Thai, using the sauce recipe from She Simmers. You can freeze both the pulp and the paste, so no worries there.
On She Simmers, she recommends letting the tamarind block soak with the water for about 20 mins, then squeezing the fiber and seed remnants out by hand. However, being the somewhat squeamish and definitely lazy barbarian cook that I am, I prefer to use HOT water and let it soak until it looks like the tamarind has absorbed nearly all the water – a process of a couple of hours, but a couple of hours that I don’t have to do a darn thing to it. So I just break up the tamarind block in the hot water with a coupe of forks and let it sit there until I can’t see any “loose” water any more.
You can squeeze this stuff out by hand, but I’ve tried it and it is sticky and messy to do it that way. So I go ahead and use the squish-it-through-a-sieve process instead. I get a very smooth, very consistent, fiber-free pulp as a result, whereas squeezing it by hand means stuff gets by me into the paste that I don’t care for, plus, well, I just don’t like the sticky feel of that stuff squishing through my fingers. Also, I waste more of the good stuff trying to do it that way – some pulp gets thrown away with the fiber and seeds. YMMV. Use the technique that works for you.
Spoon about a quarter or half of the soaked tamarind into a hand-held sieve which you rest over a large mixing bowl. Secure the sieve so it doesn’t slid around (just grab the handle) and use a soup spoon or a smallish serving spoon to scrape away at the mess in the sieve to force the pulp out, but leaving the fiber and other junk behind. When it looks like you’ve squooshed the vast majority of the good stuff out – what’s left will be much dryer though still a bit sticky – scrape down the outside of the sieve with a rubber spatula into the bowl of tamarind pulp, and toss the stuff from INSIDE the sieve. Then do the next batch.
Squishing with your hands is probably quicker, but it’s icky and (at least when I do it) pretty wasteful. If you’re ick tolerance is higher than mine (and if you weren’t raised by people who lived through the Depression so wasting ANYTHING strikes you as the worst sin that doesn’t actually involve torture or murder) you may want to go ahead and do it that way, but this is what I’m most comfortable with.

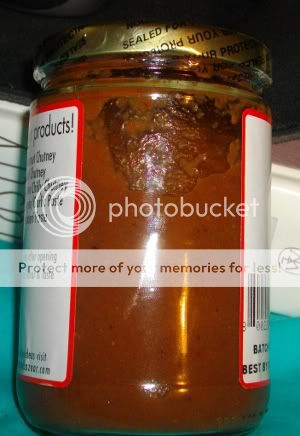
Note the pulpy bits
coating the side of the jar
For those who find this process still icky and somewhat onerous, take heart – there is an alternative, though I’ve never seen it anywhere but in an Indian grocery. You CAN buy cleaned-up tamarind pulp – PULP, not the tamarind water, tamarind juice, or tamarind “concentrate” you’ve been warned against (see the Rogue’s Gallery above). Look carefully at the jar (click the pic to the left for a larger view) and if you can see pulpy solids and if it is thick and gloppy (but not like jelly), rather than thin and watery, you can use that. It may be labeled “Paste”, “Puree”, or, most confusing of all, “Concentrate”. Look carefully at it to make sure you’re getting the actual pulp and not the watery stuff or jelly-like types of concentrate. If in an Indian grocery, tell the proprietor that you want the sort of tamarind pulp (in a jar) that is used for making chutney. It won’t be quite as thick as if you make it yourself from block tamarind; but it’ll be a lot quicker and easier.
Oh yeah, and a lot less icky.


